Configure PuTTY on Windows
To configure PuTTY on Windows we need to do the following tasks:
- Download the required software.
- Add our key to Pageant.
- Configure PuTTY.
Download the required software
To work with Hanythingondemand from Windows, you need to download and install a couple of tools. All of the following are available from the PuTTY website: http://www.chiark.greenend.org.uk/~sgtatham/putty/download.html
- PuTTy - The ssh client.
- Plink - A command line interface to the PuTTy back ends.
- Pageant - A key manager used to allow PuTTy and Plink to play together.
Add your keys to Pageant
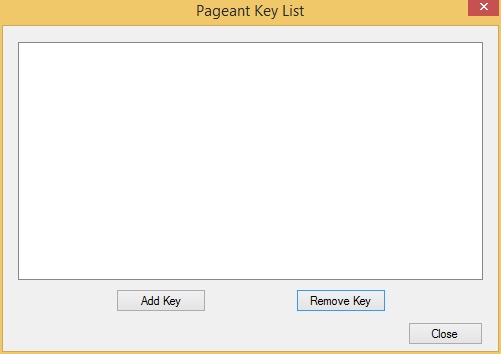
Double click the Pageant icon to run the service. Right click the icon in the
systray and click Add keys. You will be presented with a window as follows:
Click Add Key and select your ppk file. If it is password protected, you
will be prompted to enter your password. Please do so.
Configure PuTTY for the Tunnel
Configure Session
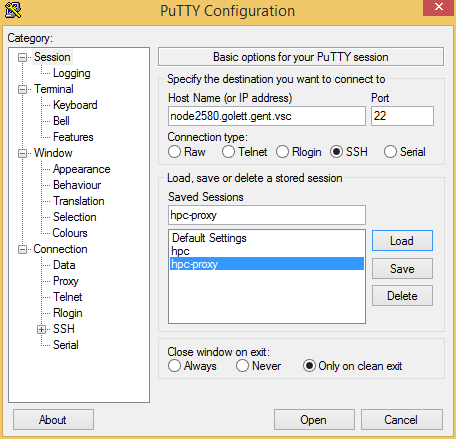
Open PuTTY and make a new connection. The connection should point to the master node of your HOD cluster.
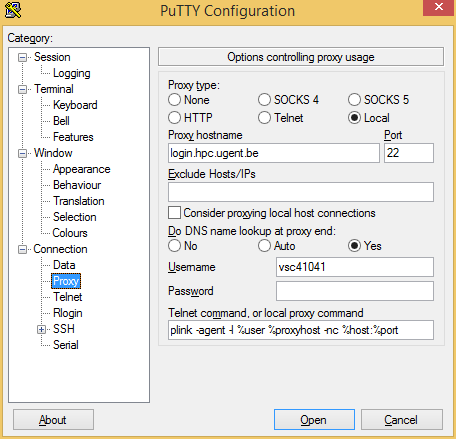
Configure Connection -> Proxy
Make the proxy local.
Under Proxy hostname enter the name of your login node. e.g. For the Ghent
University, we use login.hpc.ugent.be.
Set your DNS name lookup at proxy end to Yes. This will let you connect to the resulting host if your HPC team hasn’t all the nodes to your HPC site’s DNS. Set your username.
Under Telnet command, or local proxy command, enter the following command:
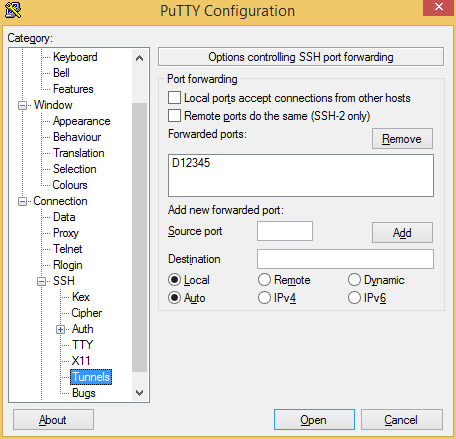
Configure Connection -> SSH -> Tunnel
Make a connection that uses Auto and Dynamic. Select a port number which
will later be used in your browser. In the screenshots, 12345 is used, but
it can be any unpriveleged port.
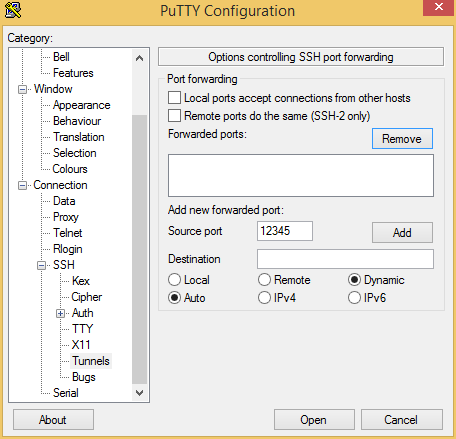
Click Add to put the configuration in place, which should make the port number appear
in the list of forwarded ports:
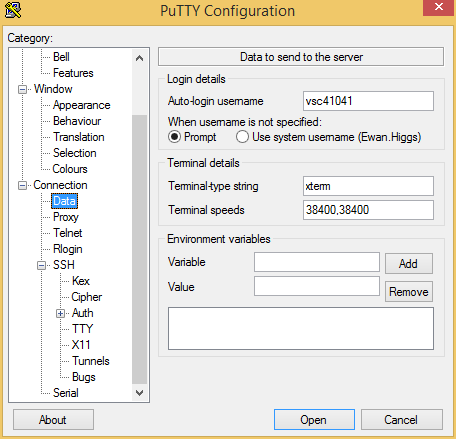
Configure Connection -> Data
Add your user name underAuto-login username. This is required here soplinkcan use this.
Saving the configuration
There are a lof of things to change here, so be sure to go back to Session
and give your configuration a name and Save it so you can reuse it via Load in the future.